
In WordPress, an image gallery is a feature that allows you to display multiple images in a grid or carousel format on your website. It provides a visually appealing way to showcase a collection of images, such as a portfolio, product gallery, or event photo gallery.
Let’s explore this basic step-by-step gallery tutorial using Elementor.
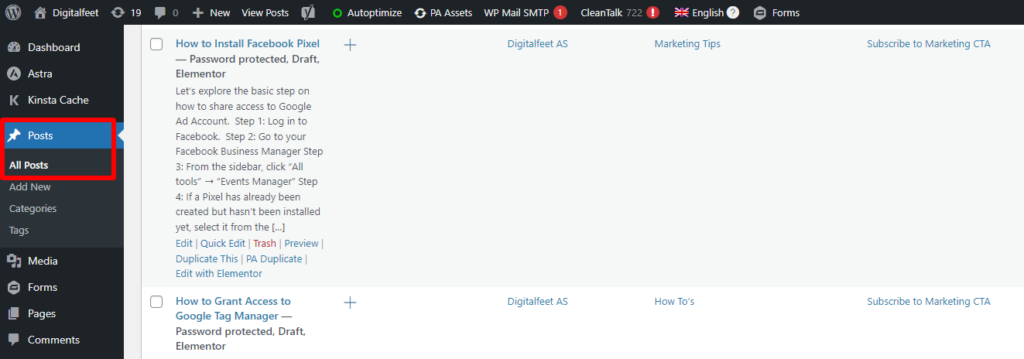
Step 1: Go to WordPress dashboard. Click on “All Post”
Select which post you want to create an image gallery.
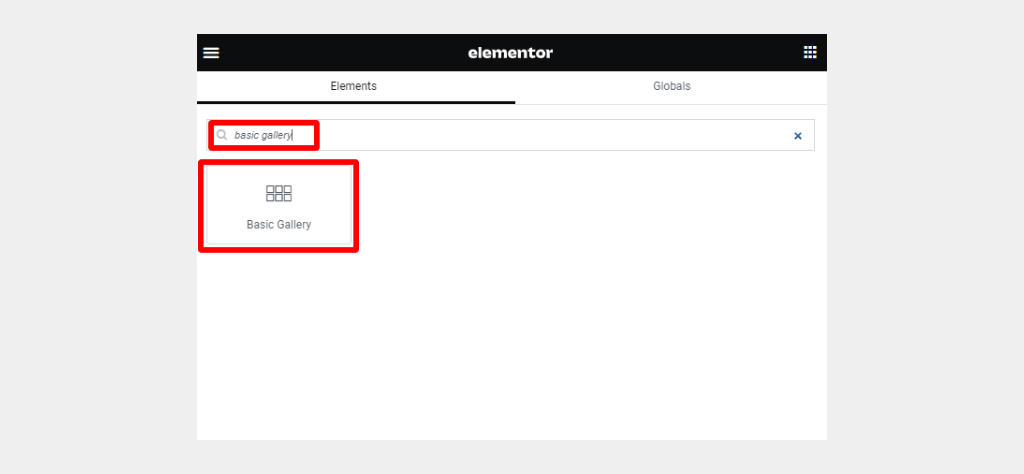
Step 2: Add the “Basic Gallery” widget
In the Elementor editor, you will find a list of widgets on the left-hand side. Look for the “Basic Gallery” widget and drag it to the desired section of your page.
Step 3: Add Images
Click the “+” sign to choose what images you want to add.
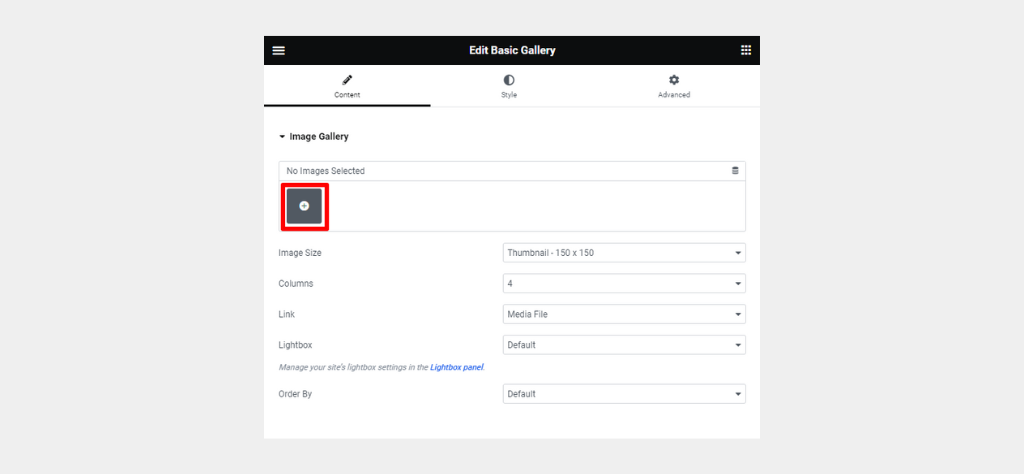
- You can set the image size.
- You can set how many columns do you want to have in the gallery.
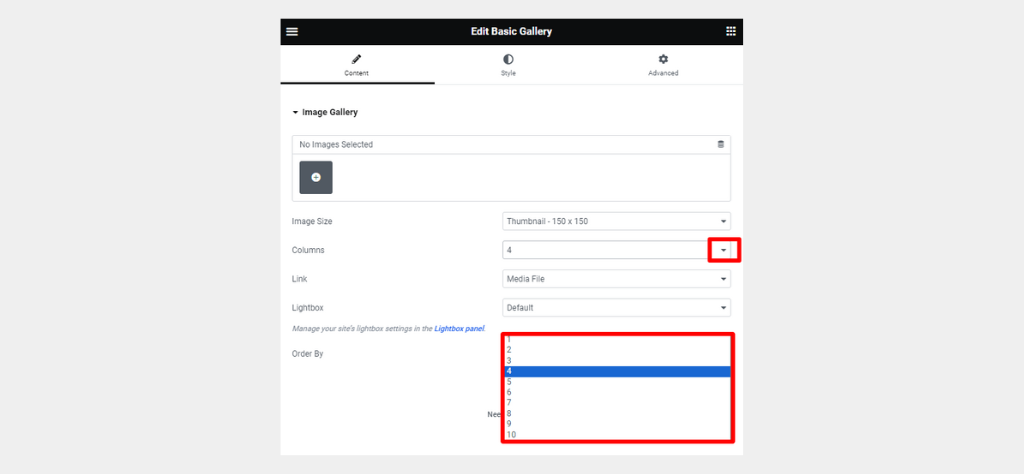
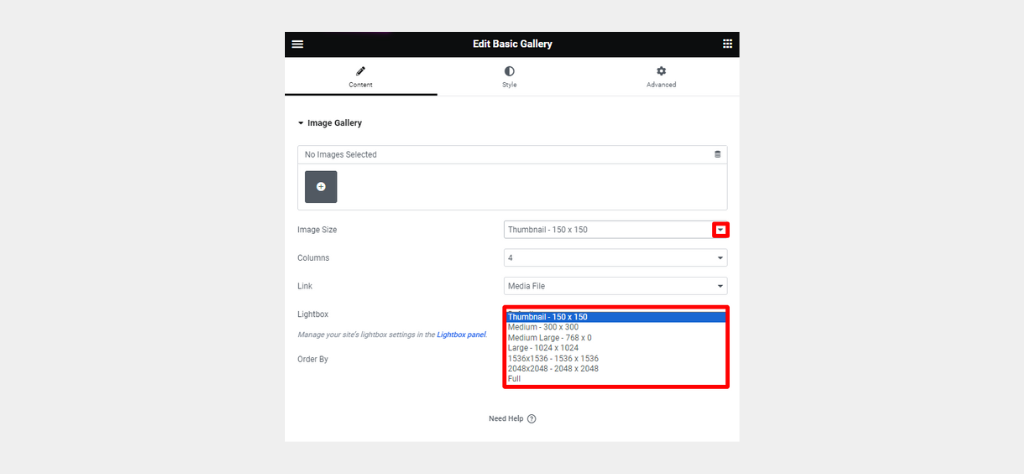
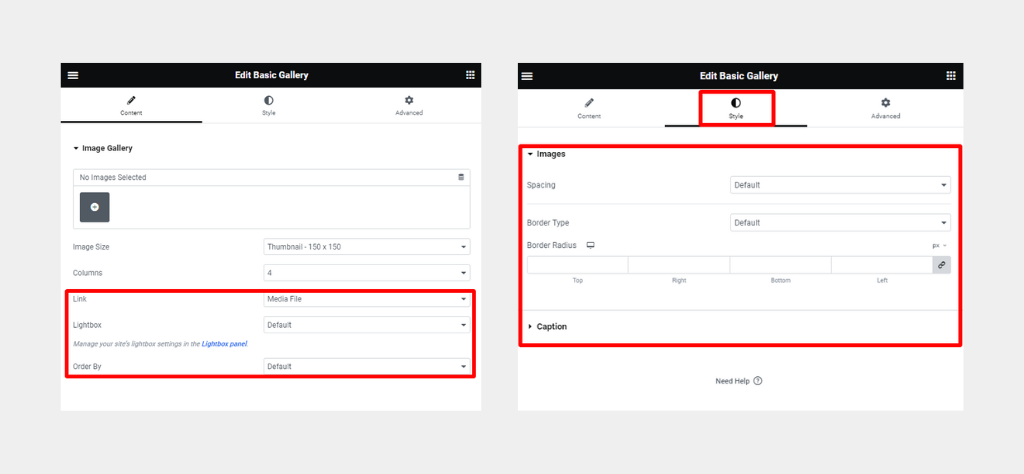
Step 4: Configure the Image Gallery Settings
- You can configure the other settings under “Style.”
Conclusion
This is how easy it is to create a WordPress gallery customization. Make sure to follow the steps carefully!


