
Buttons are a versatile and essential element of any website. They can be used to direct visitors to specific pages, take certain actions, or even download files. With Elementor, a popular WordPress page builder, adding a button to your website is easy and straightforward.
Let’s explore this basic step-by-step guide on how to add a button linked to another page with Elementor.
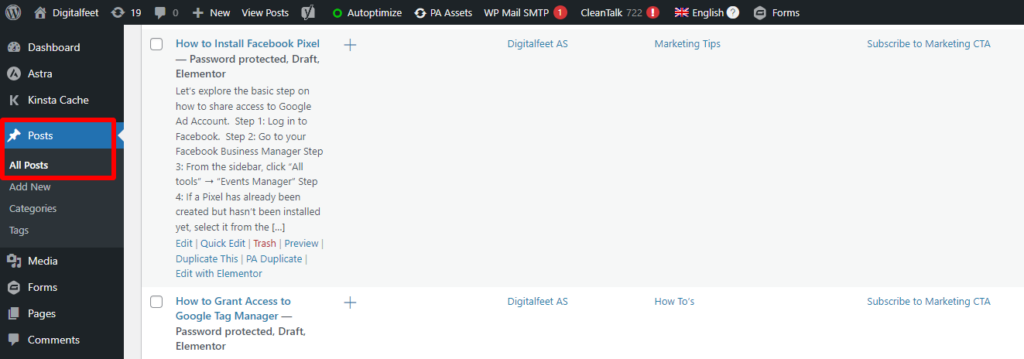
Step 1: Go to WordPress dashboard
Click on “All Post”
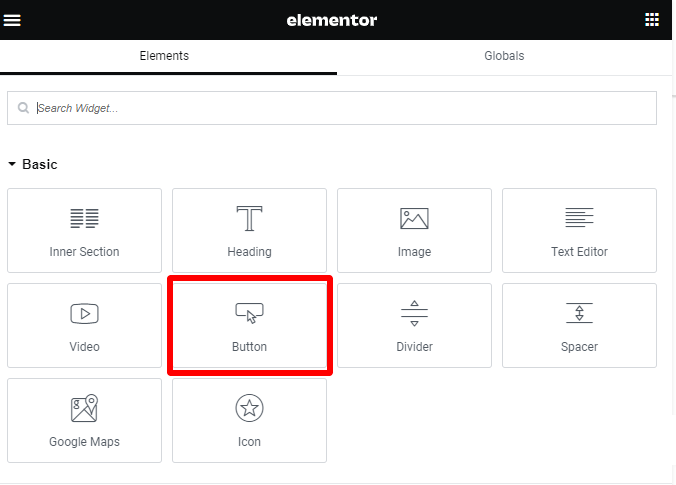
Step 2: Add a Button Widget
In the Elementor editor, you’ll find a left panel with various widgets. Locate the “Button” widget and drag it onto the page where you want the button to appear. Select which post you want to add a button.
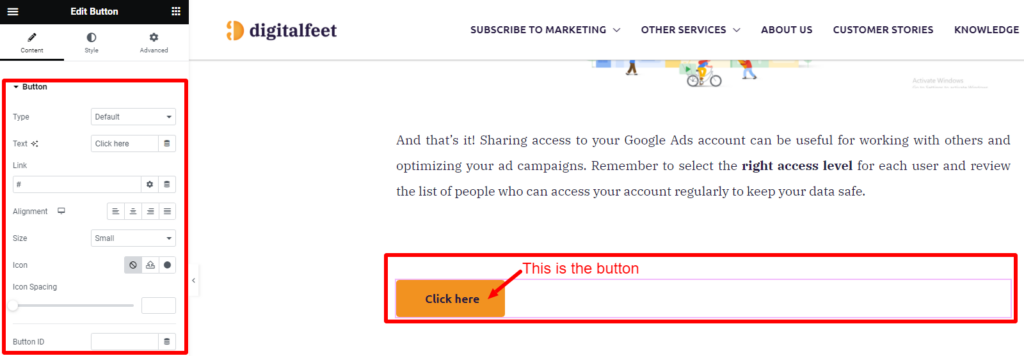
Step 3: Customize the Button
After adding the Button widget, you can customize it according to your preferences. On the left panel, you’ll see the widget’s settings. You can change the text, style, color, and size of the button to match your website’s design.
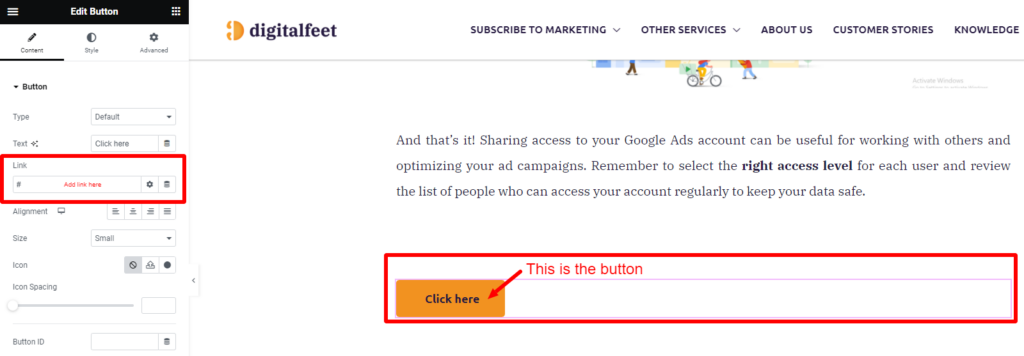
Step 4: Set the Button Link
To link the button to another page, scroll down the left panel until you find the “Link” option. Click on it and enter the URL of the page you want the button to link to. Make sure to include the full URL, including “https://” or “https://” at the beginning.
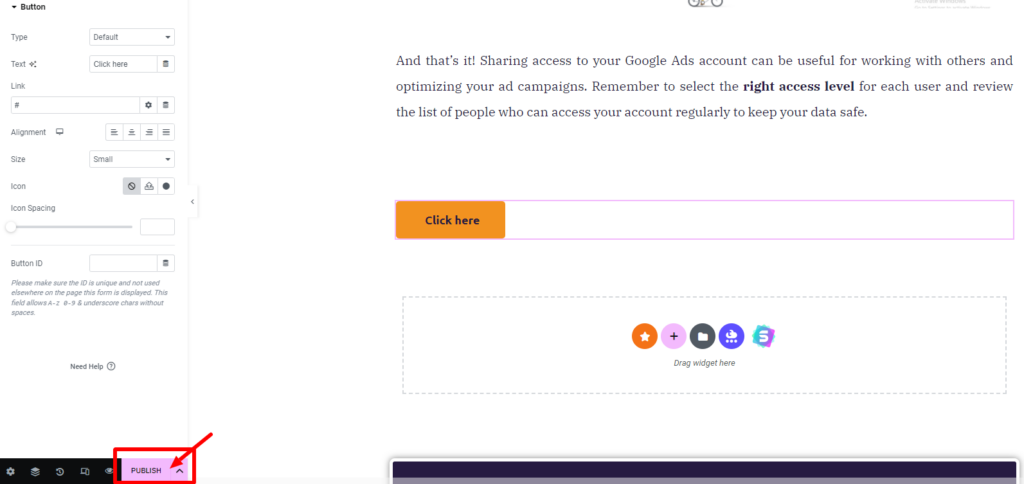
Step 5: Update
Once you have finished customizing the button and setting the link, click the “Publish” button to make the changes live on your website.
Conclusion
Adding buttons to your website is a great way to improve navigation, increase user engagement, and add visual interest. With Elementor, adding a button to your website is quick and easy.
Just follow the steps above to get started. This is how easy it is to add a button linked to another page with Elementor. Make sure to follow the steps carefully!
Frequently Asked Questions
How can I add advanced functionalities to the button, such as opening the link in a new tab or adding custom CSS for hover effects?
To add advanced functionalities to the button, such as launching the link in a new tab or adding custom CSS for hover effects, you can use Elementor’s built-in options. For opening a link in a new tab, check the “Open in new window” option in the link settings. For custom CSS, go to the “Advanced” tab and add your CSS in the “Custom CSS” section.
What steps should I follow to ensure the button’s responsiveness on different devices like tablets and mobile phones?
To ensure the button’s responsiveness on various devices, use Elementor’s responsive mode to preview and set settings specifically for mobile and tablet viewing. You can adjust margins, padding, and font sizes to make sure the button looks good on all devices.
How can I troubleshoot issues if the button does not appear correctly or the link does not work after following the provided steps?
If the button does not appear correctly or the link does not work, first check that the button widget is properly placed and that the link URL is correct. Ensure there are no conflicting plugins or themes causing issues. Clearing the cache and refreshing the page might also help. If issues persist, check the Elementor documentation or support forums for more specific troubleshooting steps.


