LinkedIn lead gen forms are a great way to capture your potential customer’s contact information who are interested in your services.
When someone clicks on your ad, they will be prompted to fill out a form with their relevant information. This information can then be used to nurture leads and convert them into customers.
Let’s walk you through the steps on how to create leadgen forms for your LinkedIn lead generation ads.
Step 1: Go to your Ad account
Go to your Ad account, click Create button and then click Campaign Group.
Step 2: Create a new group
Click “Create a new group” and click “Next.”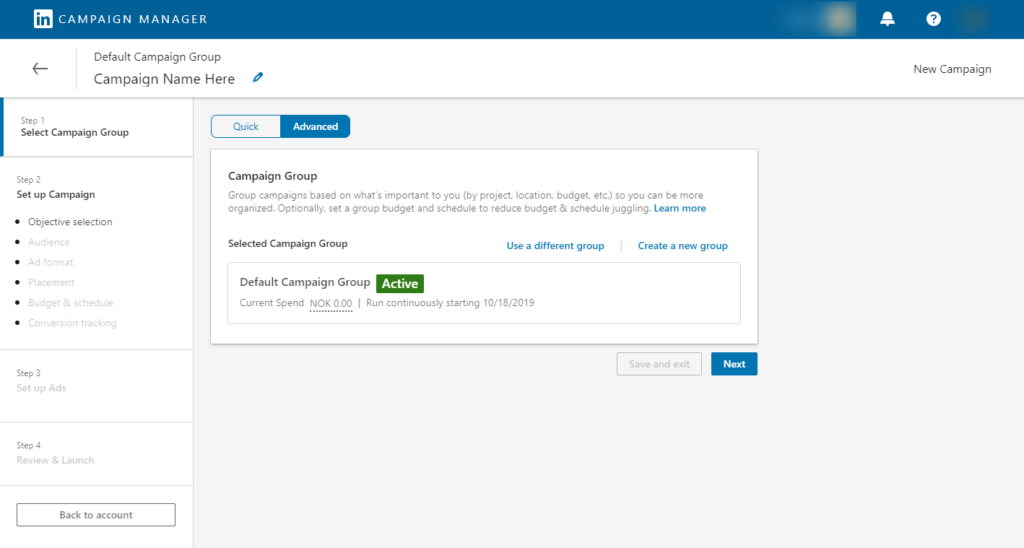
Step 3: Name your campaign
Name your campaign and enter the date of when your campaign will start. Click “Create.”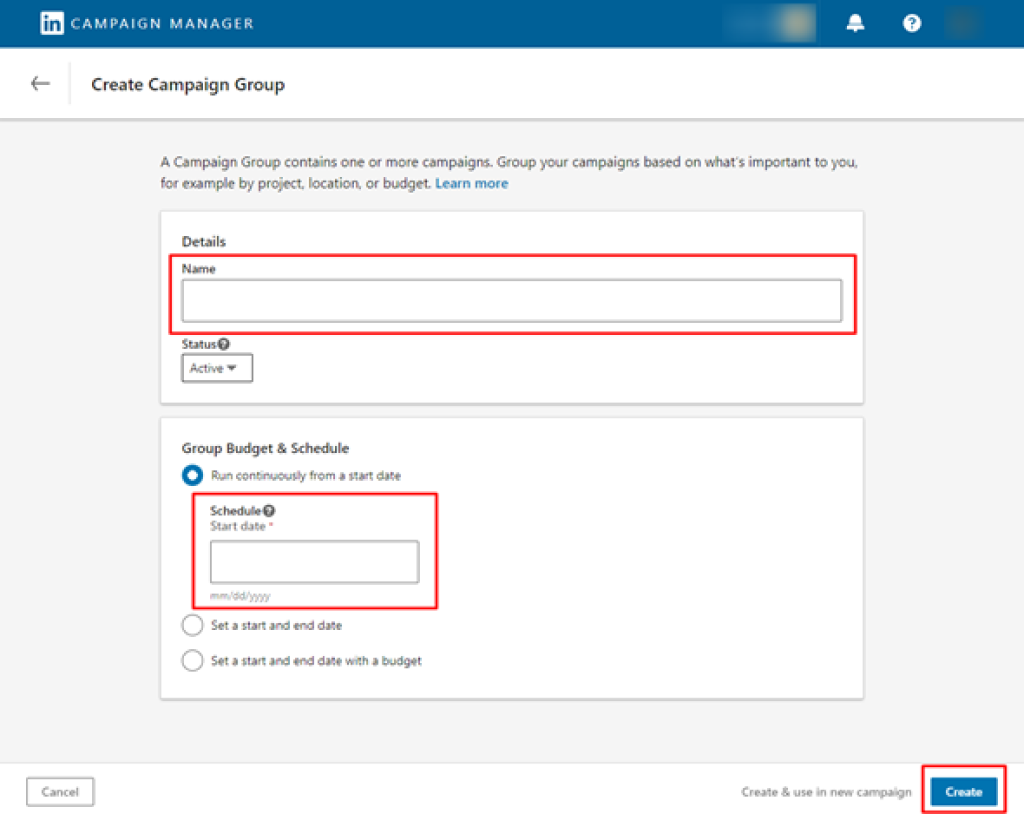
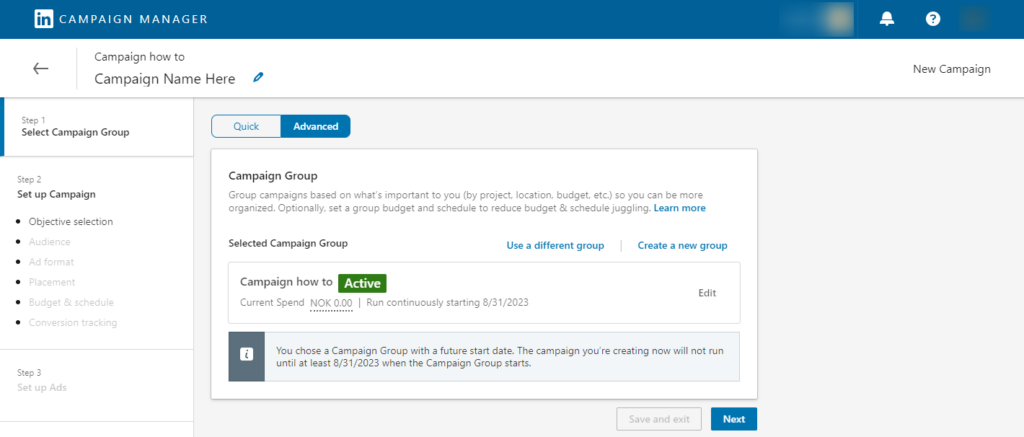
- You will be redirected back to this window, then just click “Next.”
Step 4: Select your objective
Select “Lead Generation” as your objective.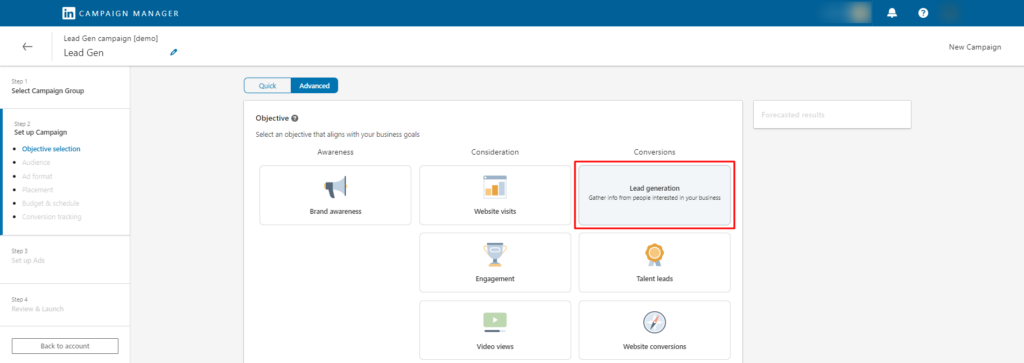
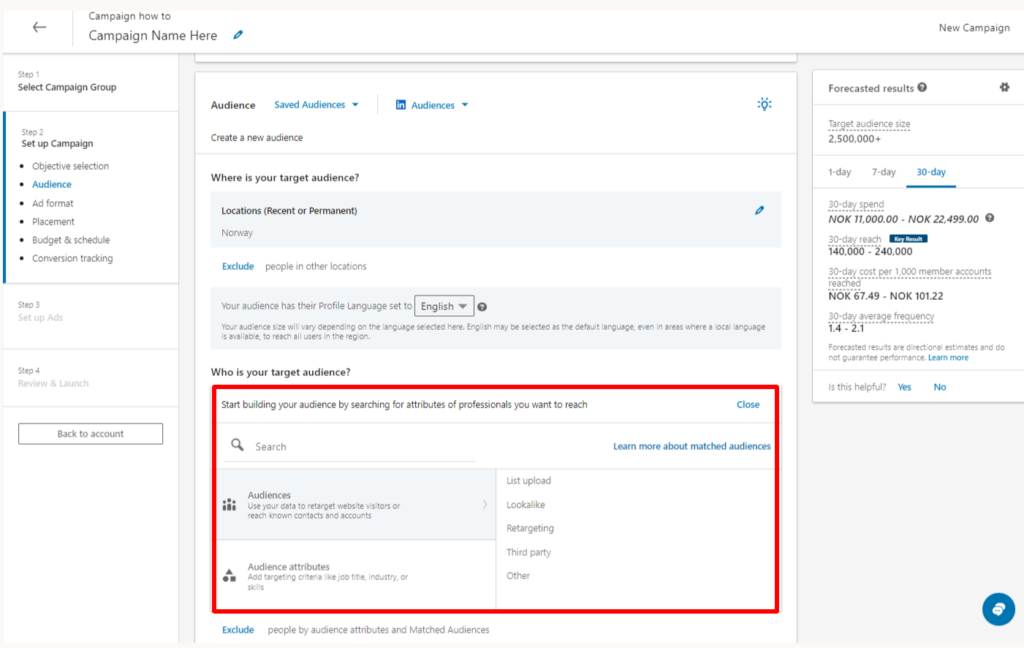
Step 5: Select your targeting criteria
Step 6: Choose Ad format
Choose your ad format, for this purpose, we will be choosing “Document” as your asset example.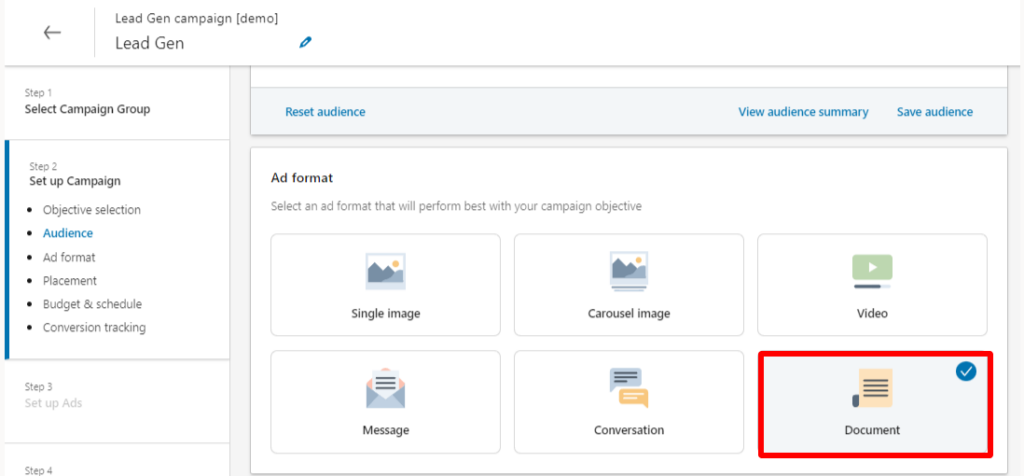
Step 7: Set your budget and schedule.
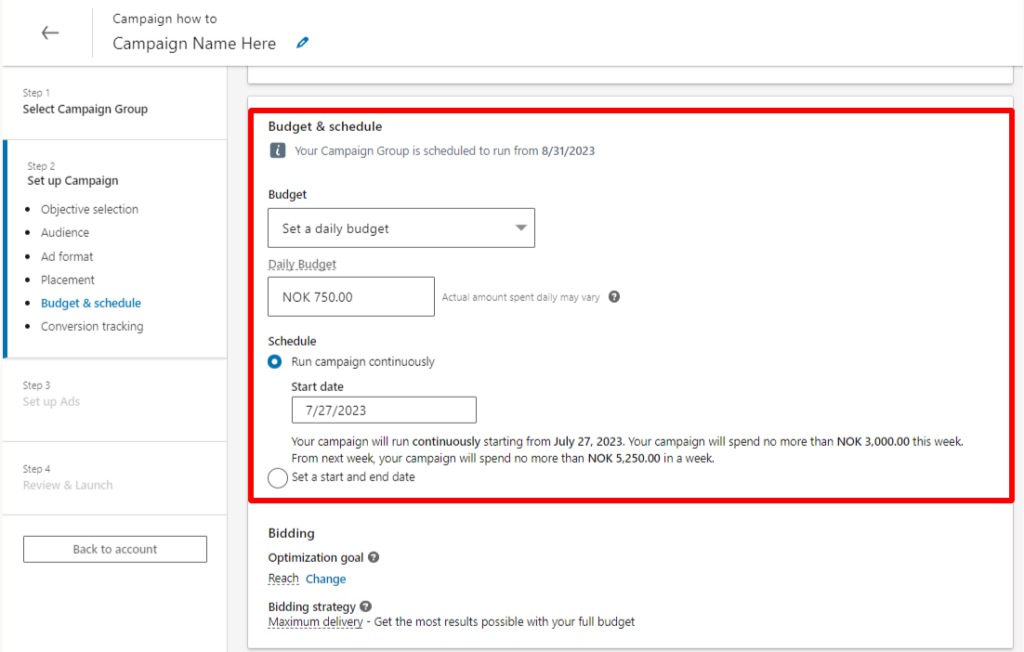
- After you set your budget and schedule, click the “Next” button below. But take note that once you click Next, you need to confirm your objective and ad format by clicking the Save button.
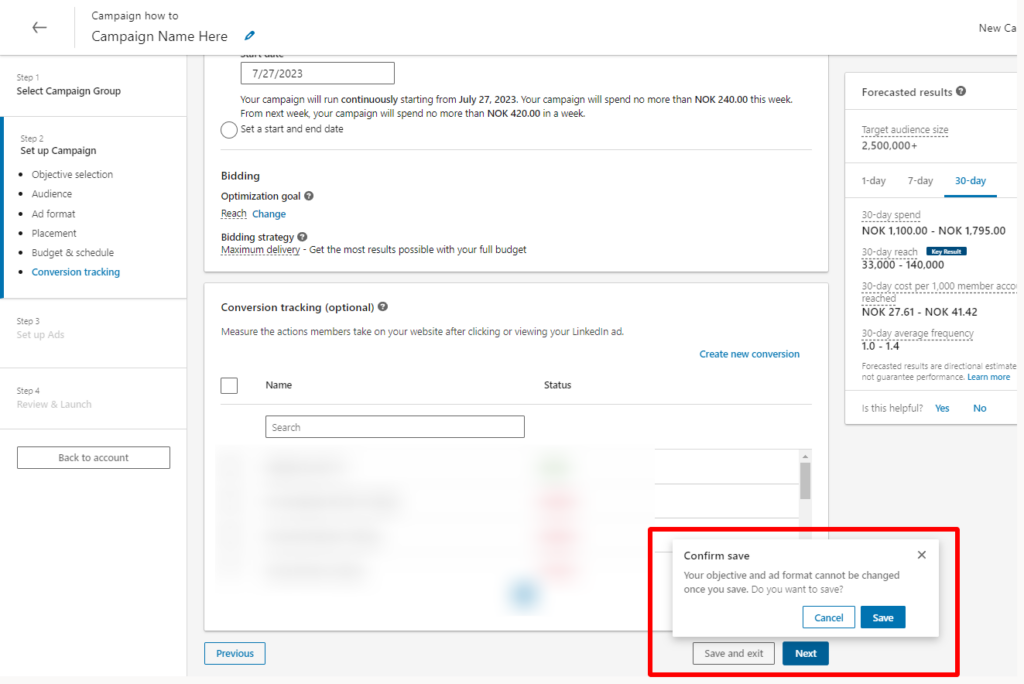
Step 8: Create your new Ads
Click on the “Create new ad(s)” button.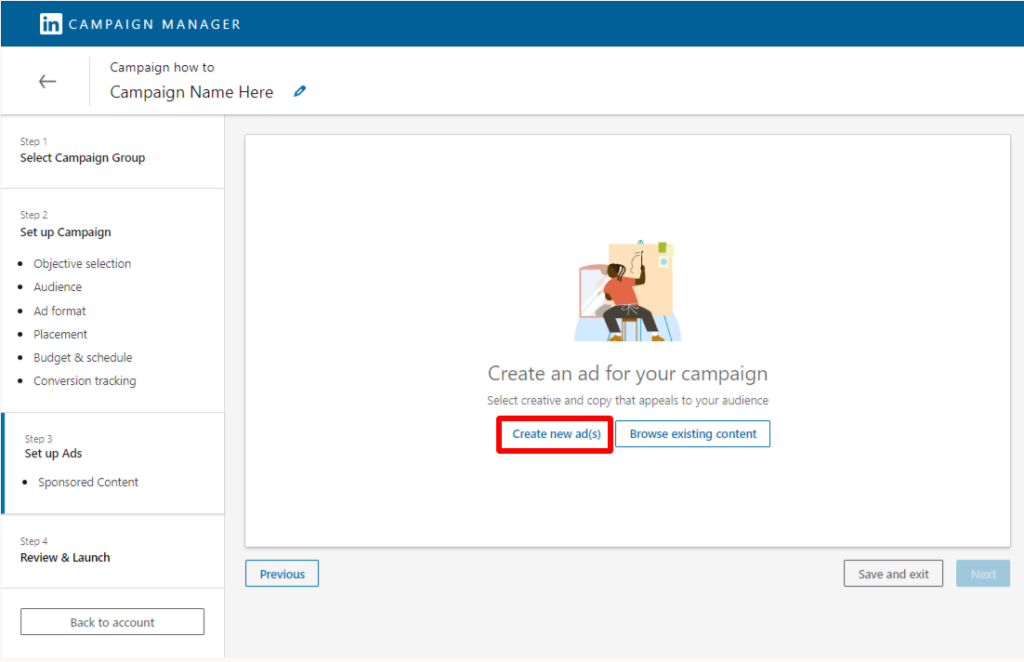
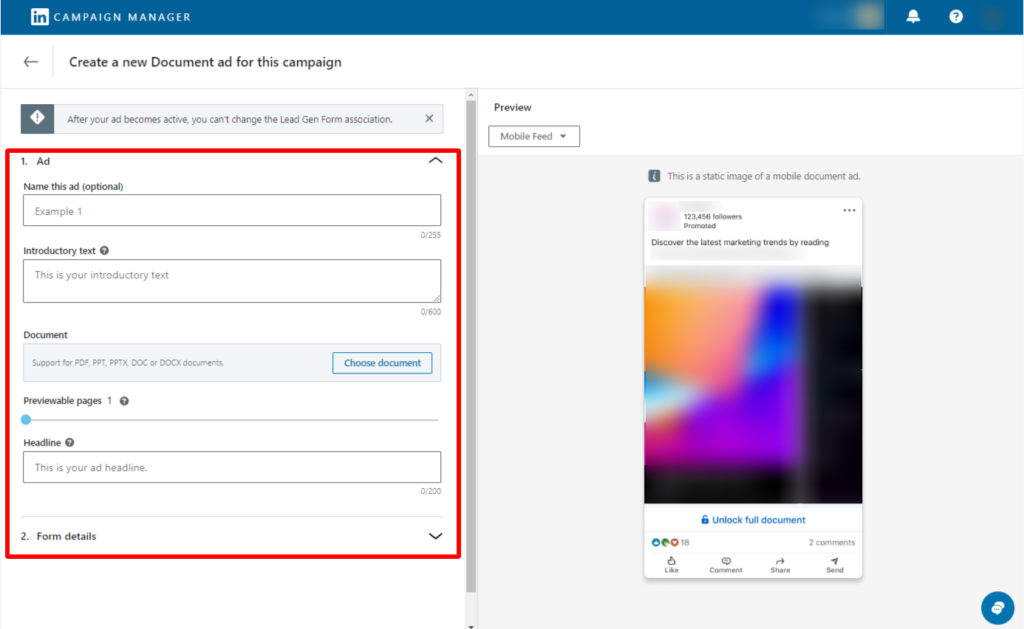
Step 9: Set up your ad creative
This includes the following:
- Introductory text (or your ad text)
- Destination URL
- Ad image/s (or ad video)
- Headline
Step 10: Set up your form
Set up your form by clicking on the “Form details” and selecting “Create new.”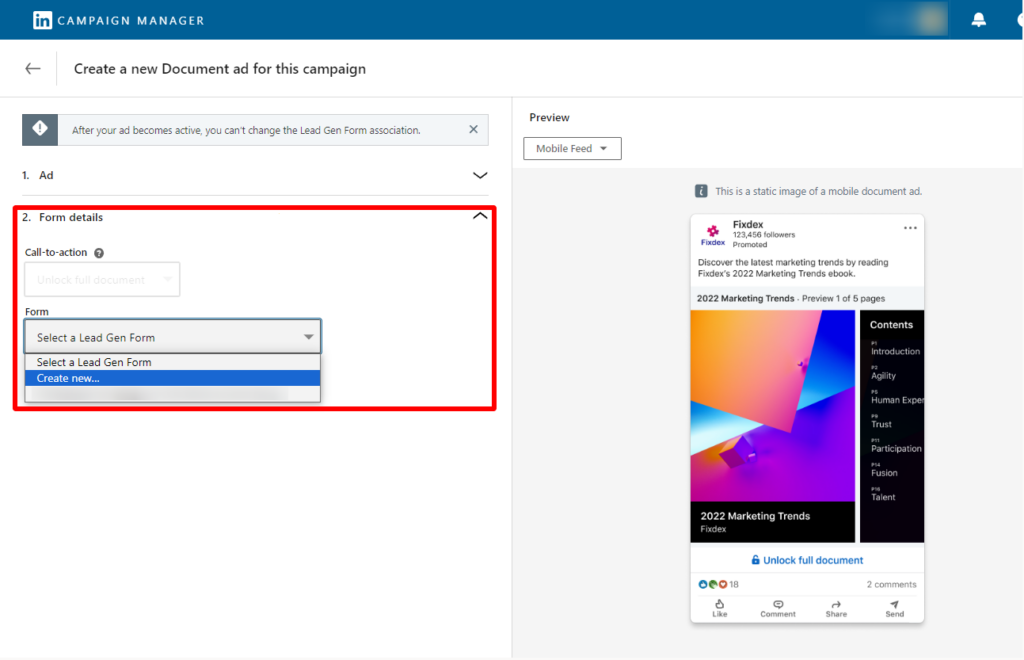
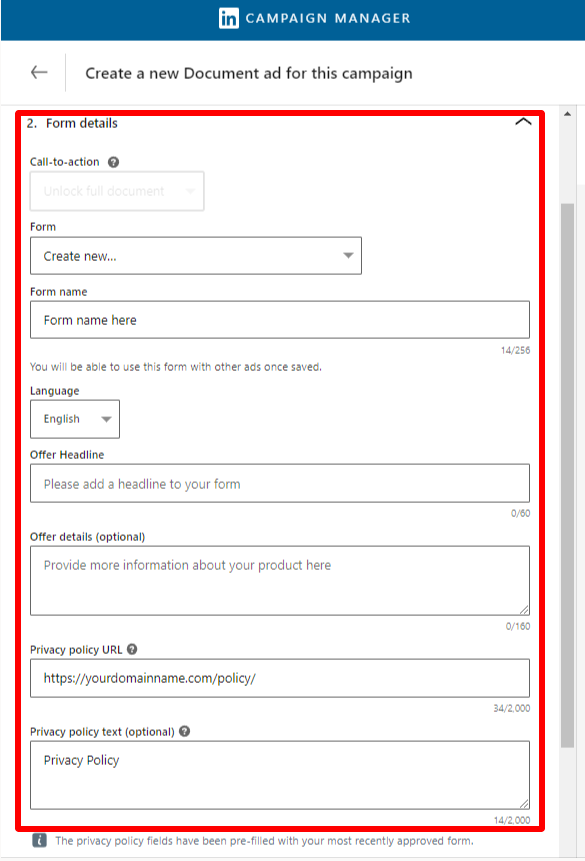
Step 11: Fill in the form details
Now, you’ll fill in the following:
- Form name
- Headline
- Offer headline
- Offer details (optional)
- Form privacy policy
Step 12: Select your audience’s contact information
In this step, you’ll be selecting the contact information you need from your audience such as their First Name, Last Name, Email Address and etc.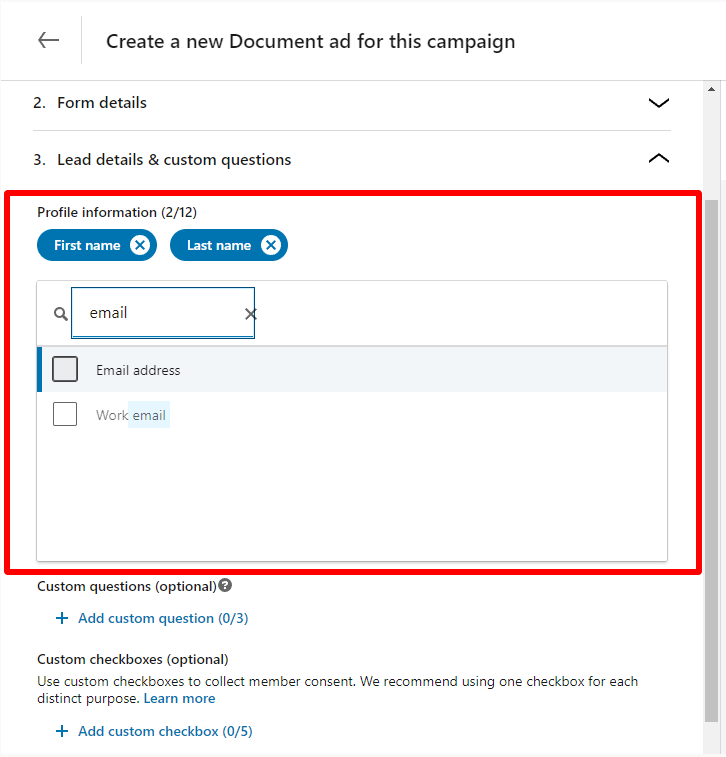
- You’ll also have the option to add a custom question to your form.
Step 13: Confirmation
In the “Confirmation” step will be the following information
- Thank you message (Once a user submits the form, they will see a thank you message. You can customize this message and include a link to download the document.)
- Call-to-action
Please note that if you have uploaded the document when you set up your ad creative in Step 11, you may skip the landing page URL, otherwise, you need to input the link to where your document is located.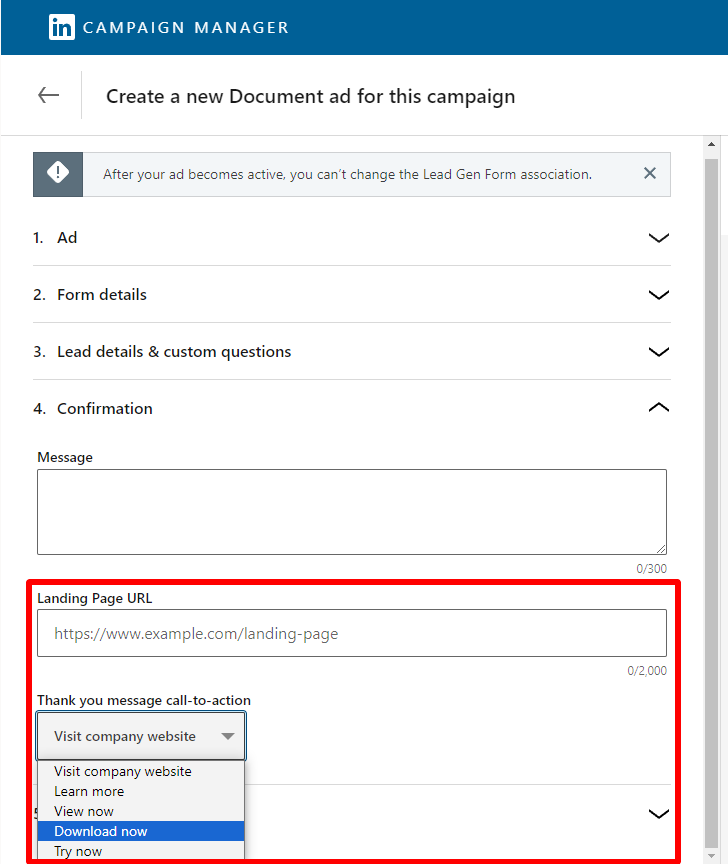
Step 14: Click “Save”
Once all are set, click “Save”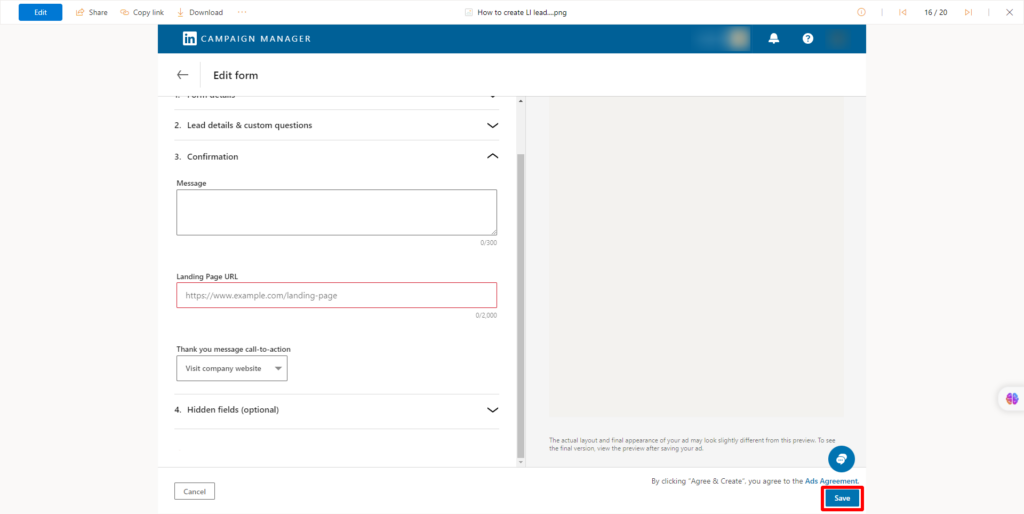
Step 15: Click “Next”
After you click save, you will be redirected to this window, then just click “Next”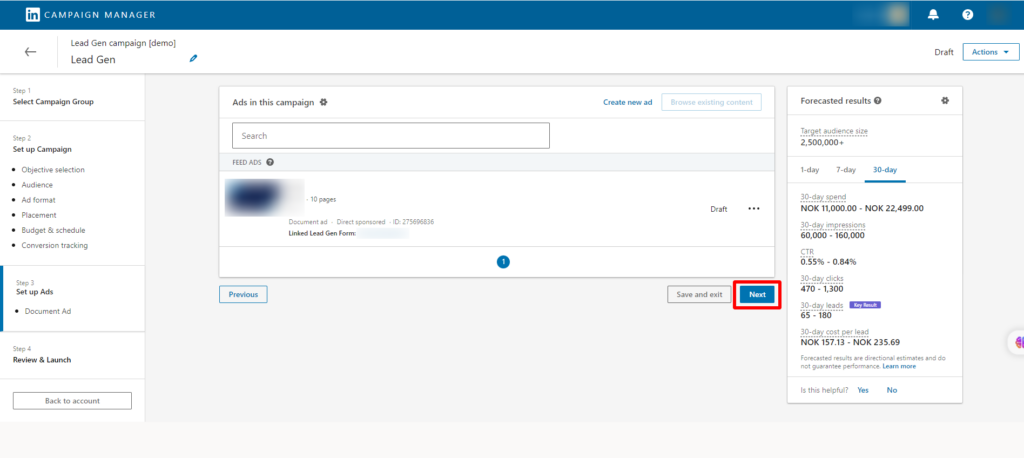
Step 16: Review and launch!
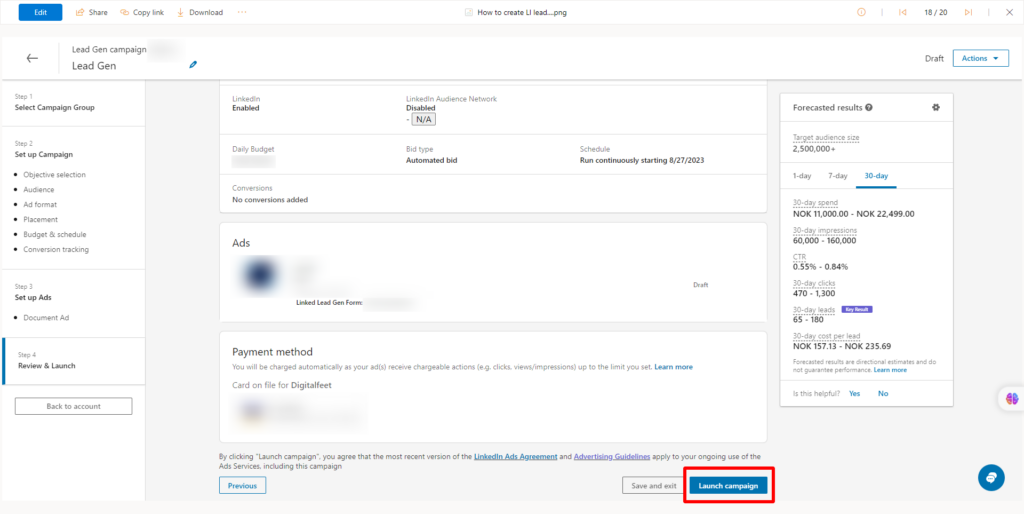
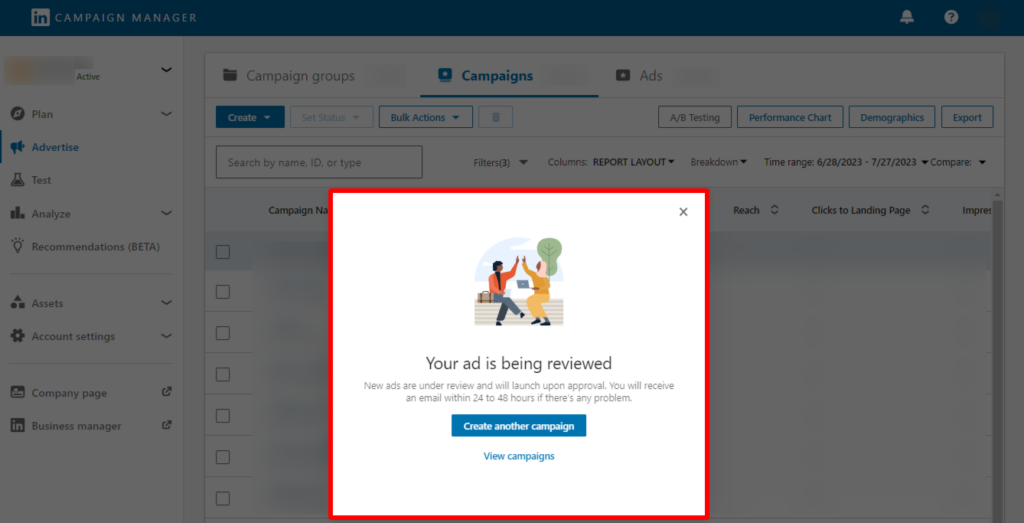
- Wait for your ad to be approved by LinkedIn.
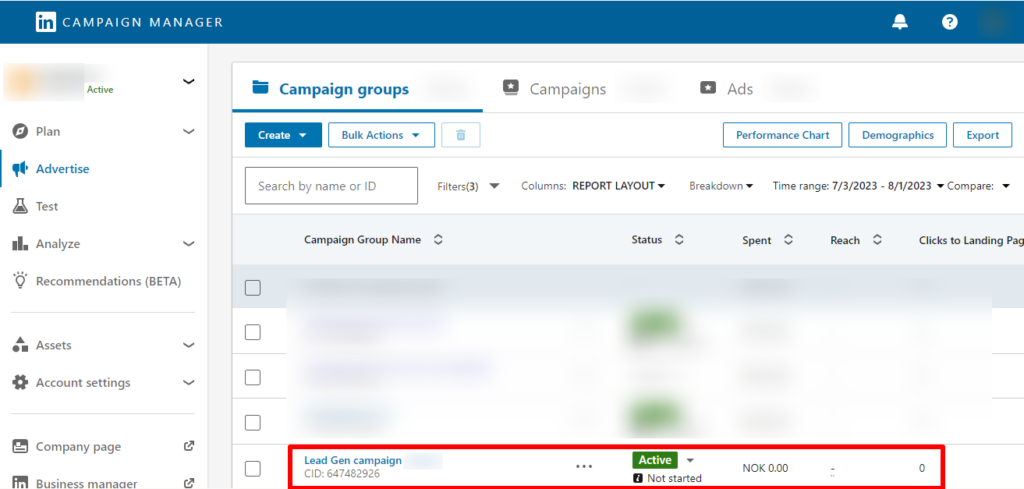
- Your ad should appear in the campaign dashboard.
Conclusion
This is how easy it is to create leadgen forms for your LinkedIn lead generation Ads. Make sure to follow the steps carefully and you can let the show begin!


