Businesses strive for efficiency and seamless operations. One powerful way to achieve this is by integrating Dynamics 365, Microsoft’s comprehensive suite of business applications, with your WordPress website.
Imagine the power of combining the dynamic capabilities of Microsoft’s comprehensive CRM solution with the user-friendly interface of WordPress.
This integration can streamline processes, enhance customer experiences, and empower your organization with robust tools.
This step-by-step guide will walk you through integrating Dynamics 365 with your WordPress site, unlocking a world of possibilities for your business.
Step 1: Assess Your Requirements
Before diving into the integration process, it’s crucial to identify your specific business needs. Determine which Dynamics 365 modules align with your goals, such as Customer Relationship Management (CRM), Enterprise Resource Planning (ERP), or Marketing Automation. Understanding your requirements will help you tailor the integration to suit your business processes.
Step 2: Set Up Dynamics 365
Ensure your Dynamics 365 instance is ready for integration. Verify that your licenses are in order and that you have the necessary permissions to access and modify data. Familiarize yourself with the Dynamics 365 environment to streamline the integration process.
Step 3: Choose the Right Integration Plugin
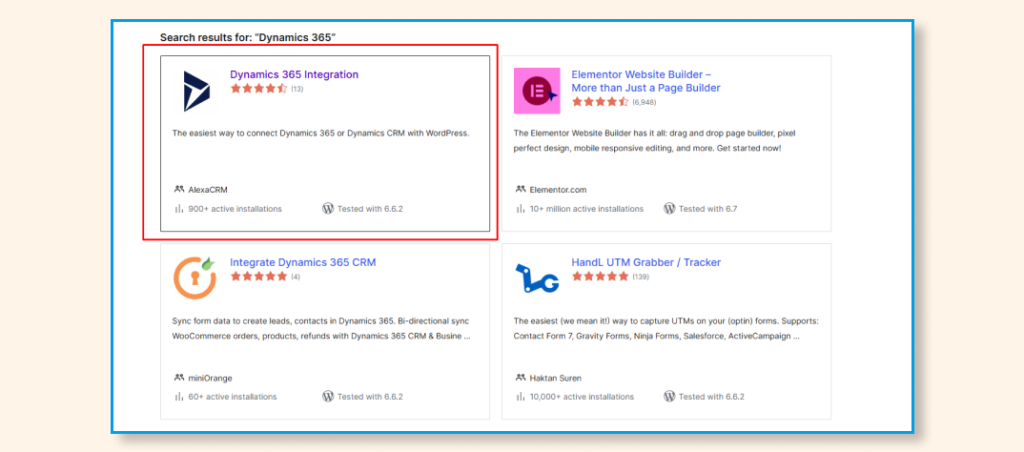
For a WordPress website, selecting the right integration plugin is pivotal. Several plugins in the market facilitate Dynamics 365 integration. Look for one that aligns with your business needs, supports the Dynamics 365 version you are using, and has positive reviews for reliability and security.

Step 4: Install and Configure the Plugin
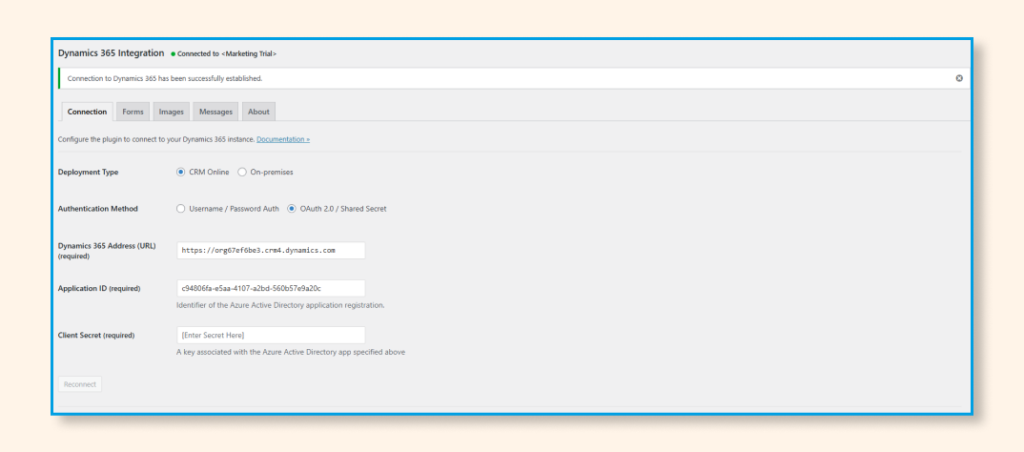
Once you’ve chosen the ideal plugin, install it on your WordPress website. Follow the plugin’s documentation to configure the settings. This typically involves entering your Dynamics 365 credentials, specifying the entities you want to sync, and establishing data mapping rules.

Step 5: Establish Data Mapping Rules
Data consistency is vital in any integration. Define clear data mapping rules to ensure that information seamlessly flows between your WordPress site and Dynamics 365—map fields such as leads, contacts, accounts, and any custom entities to guarantee accurate synchronization.
Step 6: Test the Integration
Before going live, conduct thorough testing to verify that the integration works as intended: test data synchronization, lead capture forms, and any automated processes. Address any issues or discrepancies during this phase to guarantee a smooth user experience.
Step 7: Monitor and Optimize
After the integration is live, regularly monitor its performance. Monitor data synchronization, system response times, and user interactions. Periodically revisit your integration setup to optimize configurations based on evolving business requirements.
Dynamics 365 Integration to WordPress
Integrating Dynamics 365 with your WordPress website can transform your business, fostering efficiency and enhancing customer interactions.
By following this step-by-step guide, you’ve embarked on a journey towards a more streamlined and powerful digital ecosystem. Stay vigilant, monitor performance, and continually optimize your integration to unlock the full potential of Microsoft dynamics 365 integration for your organization.


