
There are two methods to install Google Analytics onto your WordPress site. The first is by doing it manually. The second is by using Google Tag Manager.
But, First, what is Google Analytics?
Google Analytics is a free web analytics service provided by Google. It serves as a smart detective for your website.
It keeps track of all the people who visit, like where they’re from, what pages they look at, and how long they stay. It even knows if they came from social media or a search engine!
All this information is like clues that help you understand how people are using your website, what they like, and what you can improve to make their experience even better.
Why Is Setting Up Google Analytics Using WordPress Necessary?
Setting it up is like turning on the lights in a dark room – suddenly, you can see who’s visiting, what they like, and how they got to your site.
This information is super valuable because it helps you understand if your website is attracting the right people, if the content keeps them interested, and if you need to make any improvements.
By knowing these things, you can make your website even better and attract more visitors, just like how stores use information about their customers to become more successful.
Here’s the basic steps on how to setup Google Analytics on WordPress manually:
Here’s the basic steps on how to setup Google Analytics on WordPress manually:
1. First is to go to your GA property and copy your tracking code.
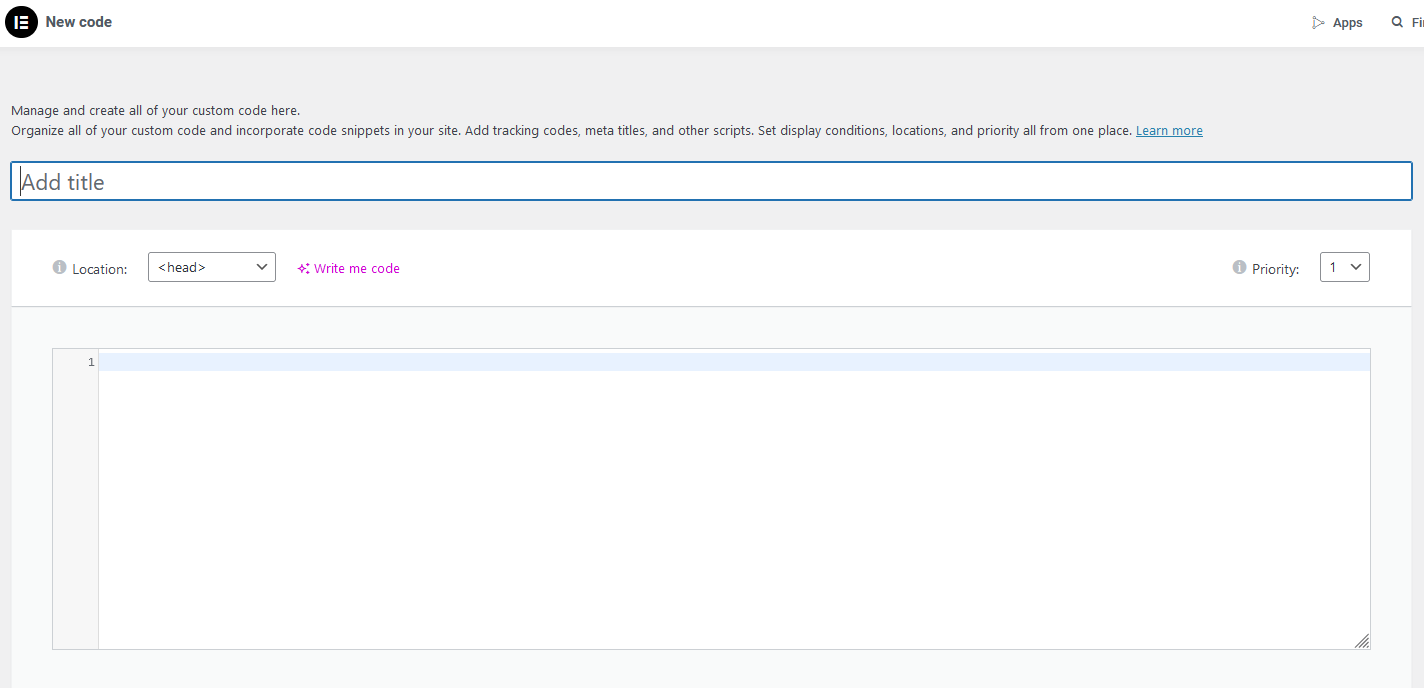
2. Go to your WordPress account. From your WordPress dashboard, navigate to Elementor -> Custom Code.
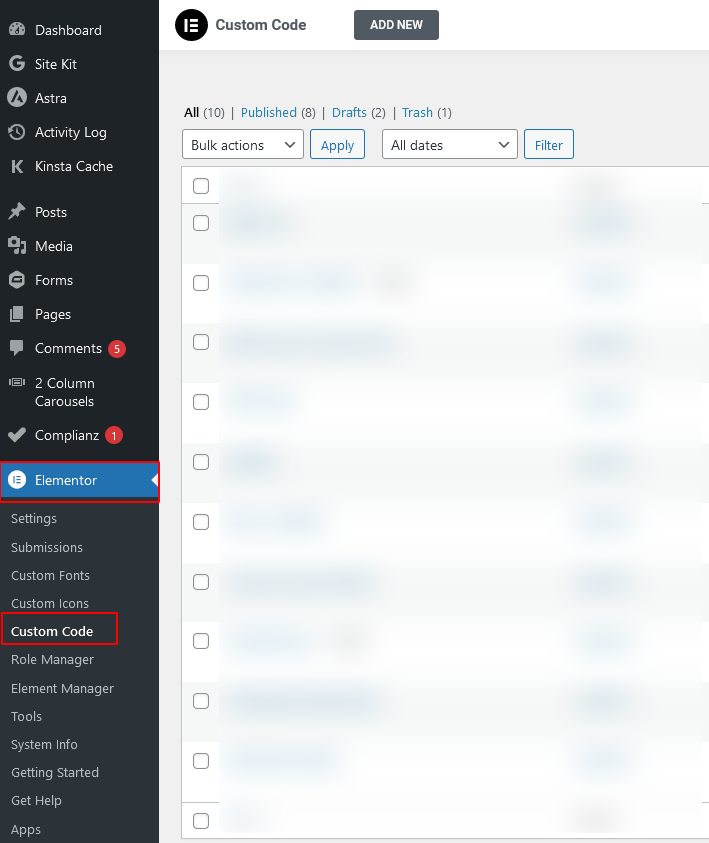
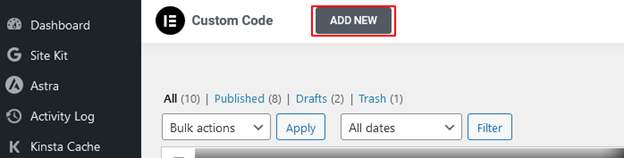
3. Select add new button at the top left of the page.

4. Add a title, set location as <head> and paste your tracking code and click on the publish button.

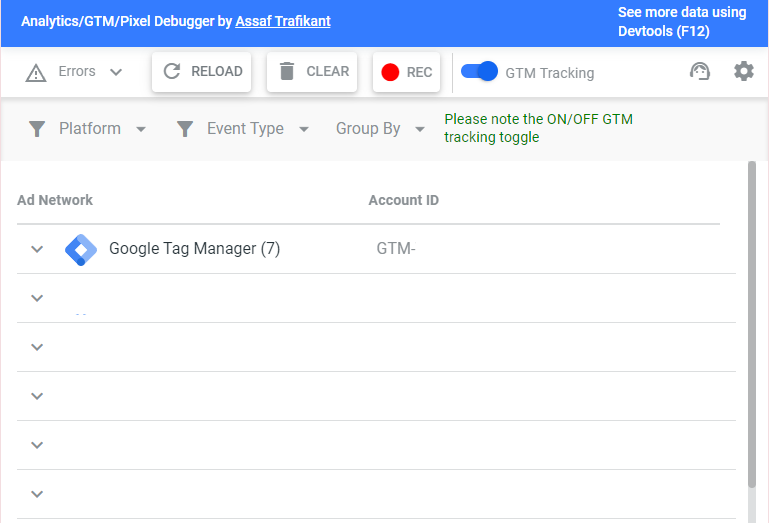
5. Once done, double check if the tracking code is working properly. To do that install a chrome extension called “Analytics/GTM/Pixel Debugger”. This extension helps to check if tracking codes are on your site.
6. Go to your domain and click on the installed extension to see if the tracking code is properly installed, for example;
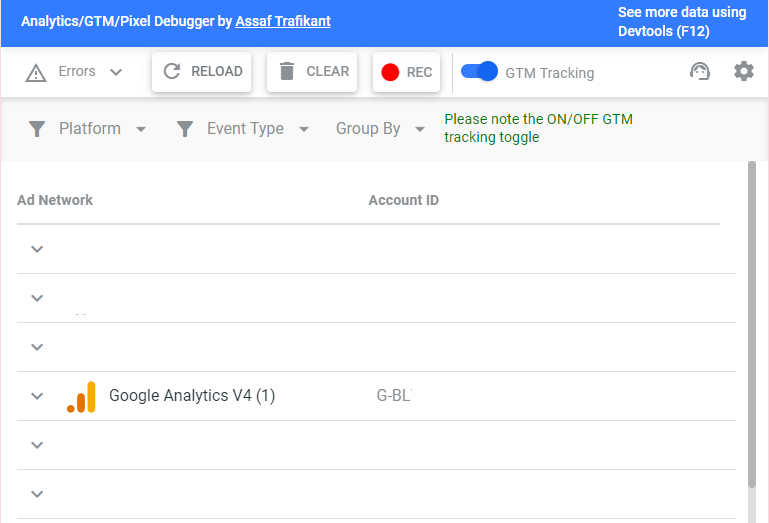
7. You can see your installed GA property with the corresponding account ID
Here’s how to setup Google Analytics (GA) with Google Tag Manager (GTM):
Why use GTM? This is so that when you want to put scripts or other tracking codes into your site, you don’t have to contact your dev to manually put it in your site.
So, how do you install GA with GTM? This is a two-part process; the first part is installing GTM. Second part is making the tag in GTM to connect GA to the site.
1st part: Installing GTM
1. First is to go to your GTM property and copy your tracking code.
2. Go to your WordPress account. From your WordPress dashboard, navigate to Elementor -> Custom Code.
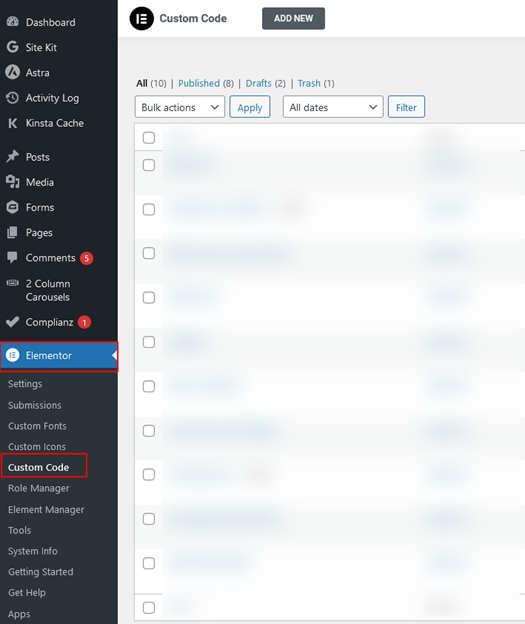
3. Select add new button at the top left of the page.
4. Add a title, set location as <head> and paste your tracking code and click on the publish button.
5. Once done, double check if the tracking code is working properly. To do that install a chrome extension called “Analytics/GTM/Pixel Debugger”. This extension helps to check if tracking codes are on your site.
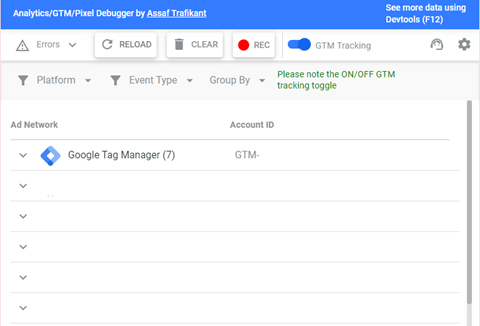
6. Go to domain and click on the installed extension to see if the tracking code is properly installed, for example;
7. You can see your installed GTM with the corresponding account ID
2nd part: Making the GA Tag
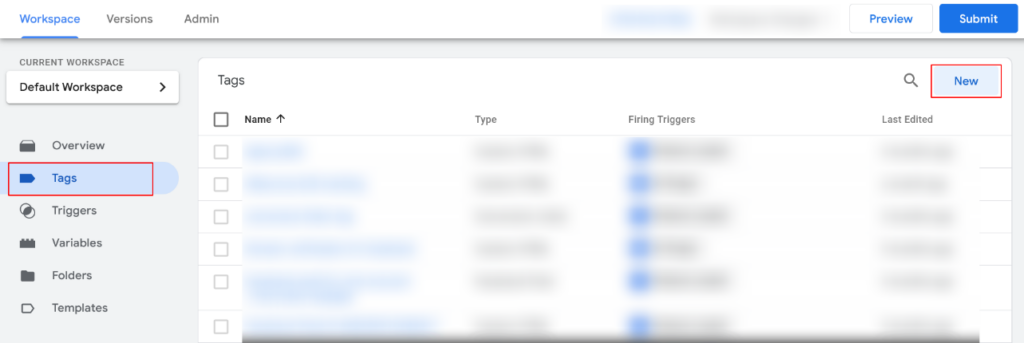
1. Go to your Google tag account and navigate to Tags and click on the “New” button
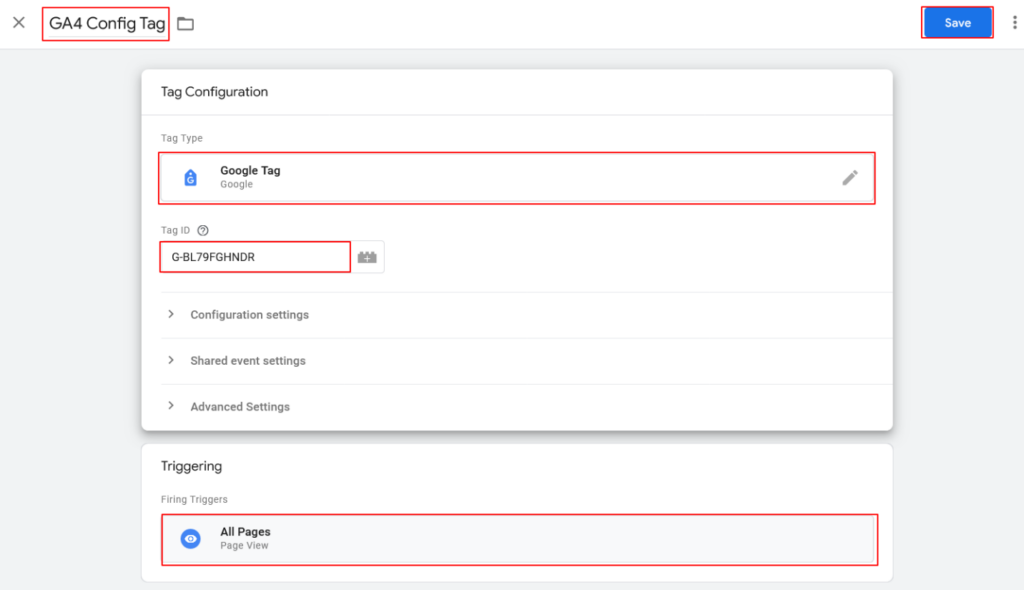
2. Select the tag configuration as a google tag under the google analytics selection, then put in your Tag ID, this tag ID can be found in your GA account, ex: G-BL79FGHNDR. For the trigger select “All Pages”. Don’t forget to title your tag. And finally, click on save.
3. After making the tag, don’t forget to publish all of the work done by clicking the “submit” button

4. When you are done submitting, go to your website to double check if the tracking code is working properly. To do that install a chrome extension called “Analytics/GTM/Pixel Debugger”. This extension helps to check if tracking codes are on your site.
5. Go to your domain and click on the installed extension to see if the tracking code is properly installed, for example;
With all of that, we are done setting up the Google analytics account both manually and with the use of Google Tag Manager.
Conclusion
So, we’ve covered two ways to get Google Analytics working on your WordPress site – the manual method and using Google Tag Manager. You can now easily see what’s happening on your website.
Whether you want to dive into code or prefer a simpler approach, setting up Google Analytics is absolutely worth the effort for building a stronger, more successful website.


